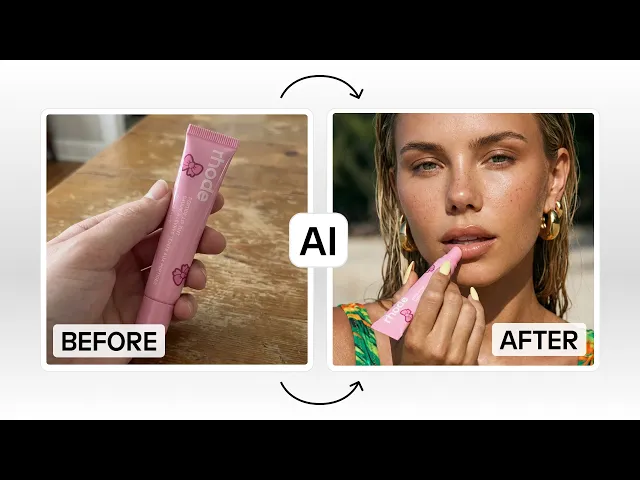
AI image generation has changed how brands create visuals. What once required a studio, photographer, models, lighting equipment, and post-production can now happen in minutes, if you know how to write the right prompt.
But here’s the problem: most people are still guessing.
They type a few keywords, hit generate, and hope for the best. Sometimes it works, but often it doesn’t.
The truth is, writing effective AI image prompts is a skill. The quality of your results depends on how clearly you describe the scene, how intentionally you control variables like lighting and angle, and how well you understand the tool you're using.
In this guide, you’ll learn practical, real-world techniques for writing better AI image prompts, whether you're creating clean product packshots, high-converting Shopify images, or lifestyle visuals for ads and social media. And we’ll show you how to apply those principles inside Instant Studio, where prompts work alongside powerful built-in settings to give you professional-level control.
Let’s break down how to prompt like a pro.
How to write better AI image prompts in Instant Studio
The first thing to understand is that in Instant Studio, your written prompt is only part of the equation. The settings you choose, angle, lighting, background, crop, AI model, do a huge amount of the heavy lifting. Think of the prompt as the finishing touch that guides the AI in the right direction.
1. Start with a preset, then layer on your prompt
Instant Studio comes with built-in presets for a reason, they've been carefully designed to produce great results out of the box. When you're just getting started, pick a preset that roughly matches the vibe you want, and then use the prompt field to add any specific details the preset doesn't already cover.
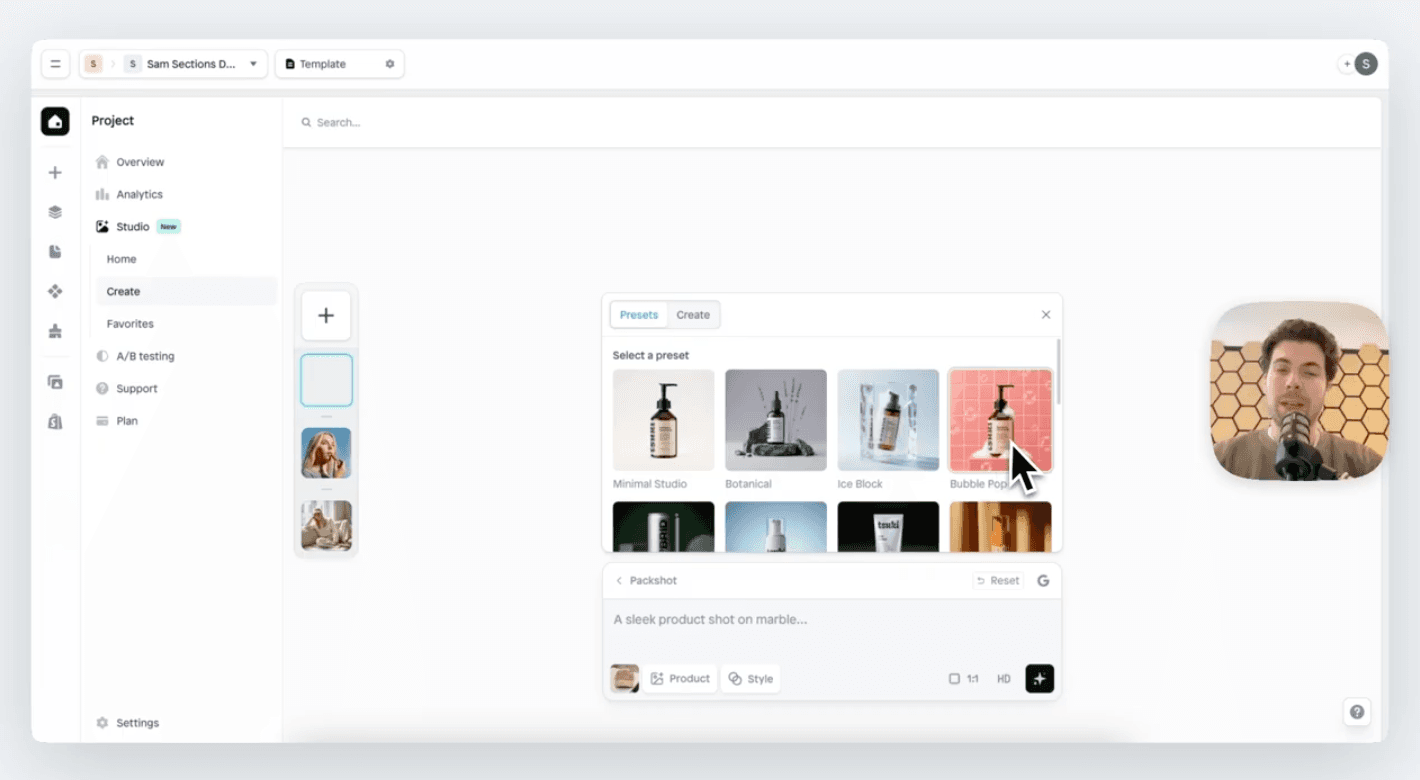
For example, if you select the "Gobo" lighting preset, you don't need to describe the lighting in your prompt, it's already handled. Instead, you might use the prompt to specify a color, surface texture, or mood. This keeps your prompts short, focused, and effective.
Try prompts like:
"Place the product on a dark slate surface with a few scattered coffee beans around it."
"Add a soft reflection underneath the product."
"Warm, slightly moody atmosphere, as if shot in the late afternoon."
Here is a tutorial explaining how to prompt for product photos in Instant Studio:
2. Write in sentences, not keywords
One of the biggest beginner mistakes is typing a list of words like: "hat, white background, studio, clean." AI image models, especially Gemini and FLUX, which power Instant Studio, are built to understand natural language. They respond far better to descriptive sentences.
Instead of a keyword dump, paint a picture:
Try prompts like:
"Show the hat centered on a clean white surface with soft studio lighting and a slight shadow underneath."
"A close-up of the product on a marble countertop, softly lit from the left, with a blurred background."
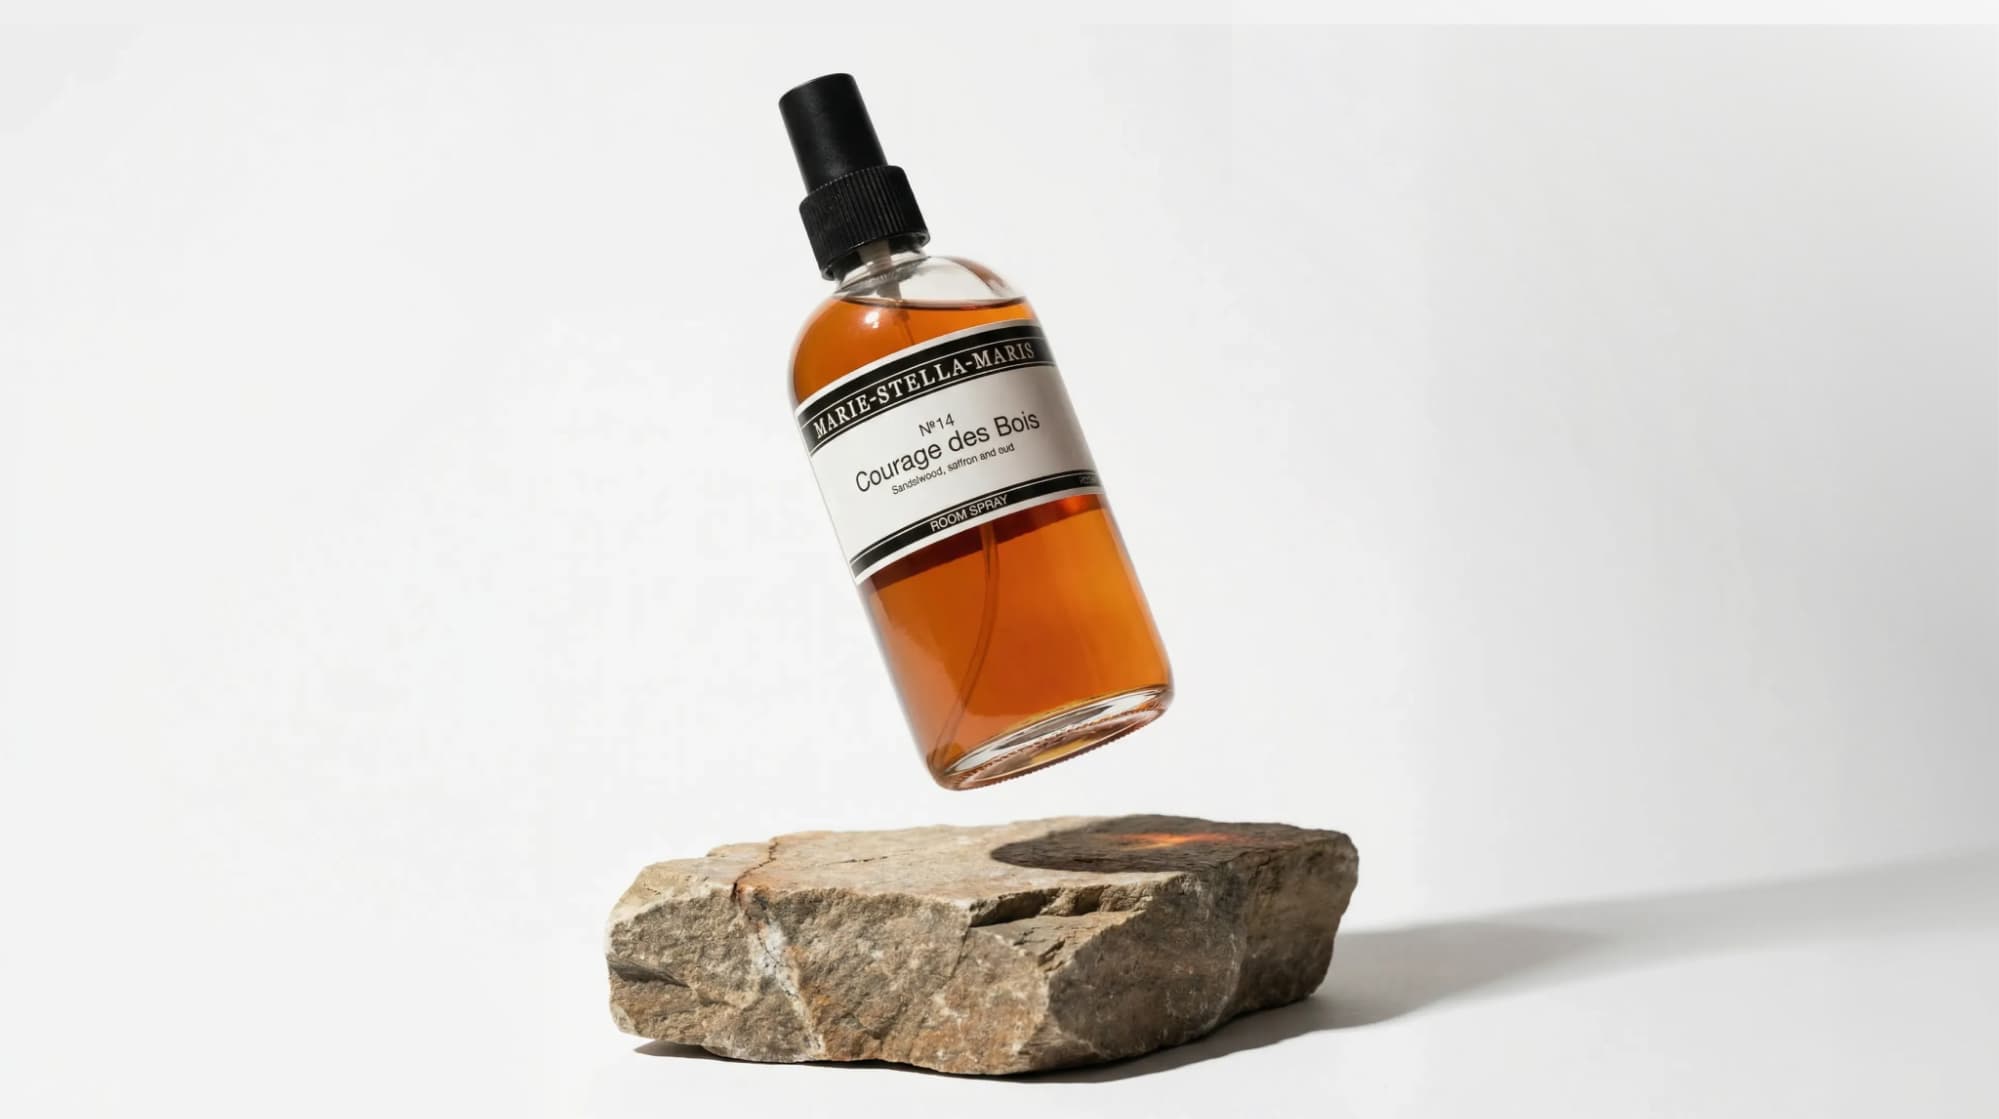
"The bottle sits upright on a reflective black surface, surrounded by subtle mist."
The difference in output quality can be dramatic. Think of it like giving directions to a person, not a search engine.
3. Be specific about angle and crop, but use the settings first
Instant Studio lets you set the angle (front, side, back, overhead) and crop (full product, close-up) directly in the settings panel. Always set these using the controls first. But if you need something more nuanced, you can reinforce it in the prompt.
Try prompts like:
"Slightly elevated 45-degree angle, showing the top and front of the product equally."
"Close-up focusing on the stitching detail along the brim."
"Bird's eye view, product perfectly centered, minimal background."
This combination of settings plus prompt gives you precision that neither alone can fully achieve.
4. Describe your lighting like a photographer would
Lighting is one of the most powerful things you can control in a product image. Instant Studio's lighting settings are your starting point, but your prompt can push things further.
Try prompts like:
"Soft golden hour light streaming from the left, casting a long warm shadow to the right."
"A three-point softbox setup with diffused highlights and no harsh shadows."
"Bright, airy natural window light, clean white background, minimal shadows."
"Dramatic side lighting that highlights the texture of the fabric."
Even if you're not a photographer, these terms are easy to pick up, and they make a real difference in how polished your results look.
5. Set the mood with a scene description for lifestyle shots
When you switch from a packshot to a lifestyle image, you're telling the AI to show your product in action, on a person, in an environment, in a moment. This is where your prompt can really shine.
Don't just say what the product is. Describe the feeling of the scene.
Try prompts like:
"A warm golden afternoon in a city park. The model is relaxed, wearing the hat with a casual linen outfit. Natural light, slightly grainy high-fashion feel."
"Urban street style shoot, midday light, busy background softly blurred. The model is mid-stride, confident and relaxed."
"Cozy Sunday morning at home, soft overcast light through a window, the model holding the product naturally, wearing a neutral knit sweater."
Details like time of day, setting, and mood give the AI the full picture it needs to create something that feels authentic rather than staged.
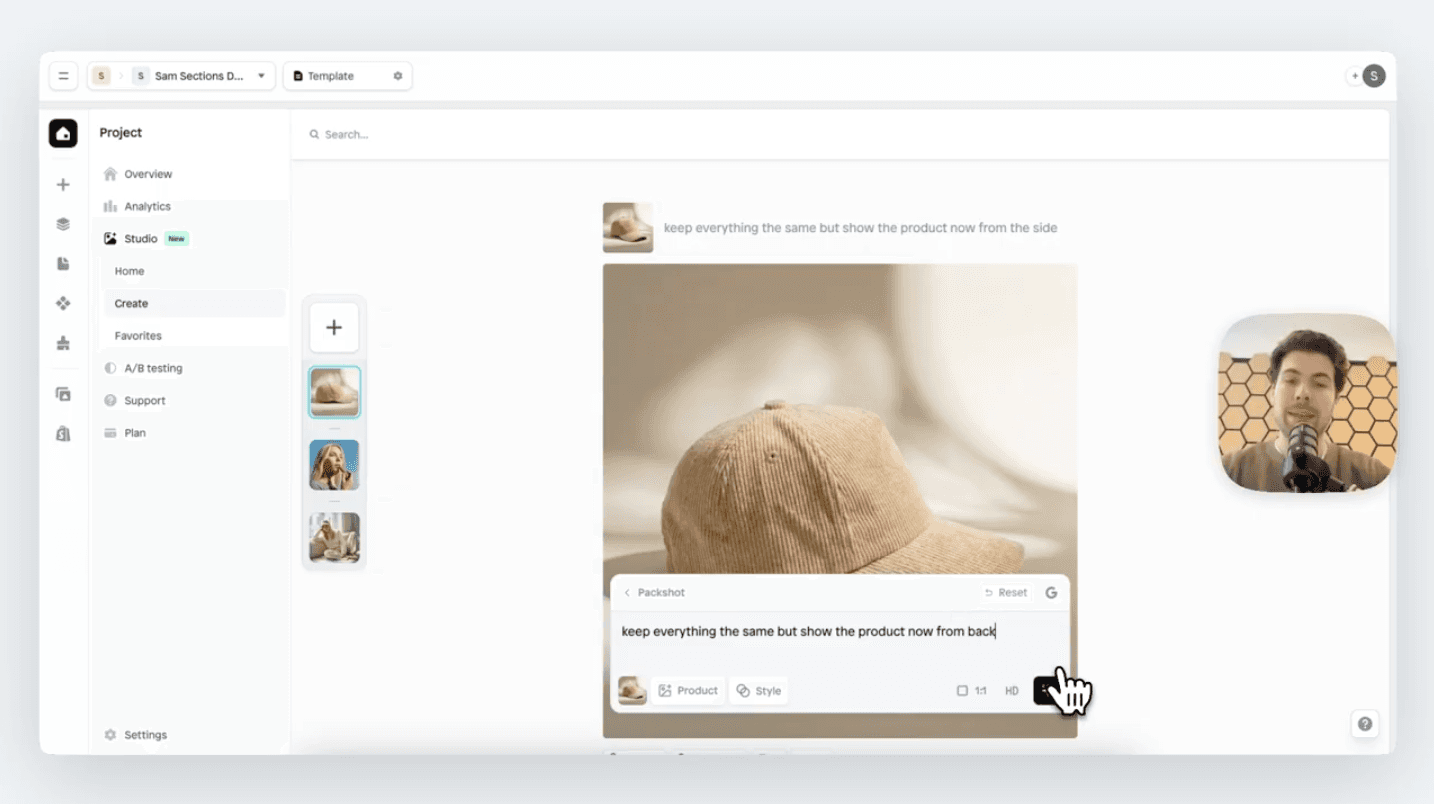
6. Use "keep everything the same, but..." for consistent variations
Once you've generated a shot you're happy with, click "Edit with AI" and build on it rather than starting over. This is how you create a cohesive library of product images that all feel like they belong together.
Try prompts like:
"Keep everything the same, but show the product from the side."
"Keep everything the same, but change the background to a warm terracotta tone."
"Keep everything the same, but zoom in closer to the product label."
"Keep everything the same, but make the lighting slightly moodier and more dramatic."
This approach is perfect for building out a full set of images for a Shopify store or ad campaign without losing consistency.
7. Pick the right AI model for the job
Instant Studio lets you choose between different AI models, including Gemini and FLUX. This choice matters more than most beginners realize.
Gemini (especially Gemini 3 Pro) is excellent for complex, detailed prompts. It's a thinking model, meaning it reasons through your instructions before generating. It's great for lifestyle shots, nuanced scenes, and when you need your instructions followed very precisely.
FLUX models are known for photorealistic quality and are particularly strong at product photography, accurate color rendering, and high-fidelity detail on things like fabric, skin, and surfaces.
As a rule of thumb, for clean packshots, FLUX often delivers excellent results. For richer lifestyle scenes with more layered instructions, Gemini tends to shine.
8. Always set your resolution and aspect ratio intentionally
It's easy to leave these on default and forget about them, but they matter a lot depending on where your image will end up.
1:1 (square) is perfect for Instagram posts and most e-commerce product pages
9:16 (vertical) works great for Stories, TikTok, and mobile ads
16:9 (horizontal) is ideal for banners, email headers, and desktop ads
For quality, go 2K or 4K whenever you need the image for print, large displays, or hero shots on your website. HD is fine for social media thumbnails and quick tests while you're iterating.
9. Describe colors with precision
Vague color instructions like "nice blue" leave too much up to interpretation. The more precise you are, the more consistent and on-brand your results will be.
Try prompts like:
"Deep navy blue with a slight matte finish, no shine."
"Warm ivory, almost cream, with a soft linen texture visible on the surface."
"Muted sage green, earthy and natural, complemented by a wooden background."
10. Don't over-stuff your prompt
More words don't always mean better results. If your prompt is a wall of text trying to control every single element, the AI can get confused and produce something muddled.
A good rule: use the settings panel to handle the structural stuff (angle, lighting, crop, background tone), and keep your written prompt focused on the one or two things the settings can't cover. A tight, clear prompt almost always beats a long, cluttered one.
Compare these two approaches:
Too much: "White background clean studio lighting front angle full product sharp focus neutral colors professional product photography high quality no shadows crisp edges centered composition."
Just right: "Clean white background, soft neutral shadows, product perfectly centered." (and let the settings handle the rest)
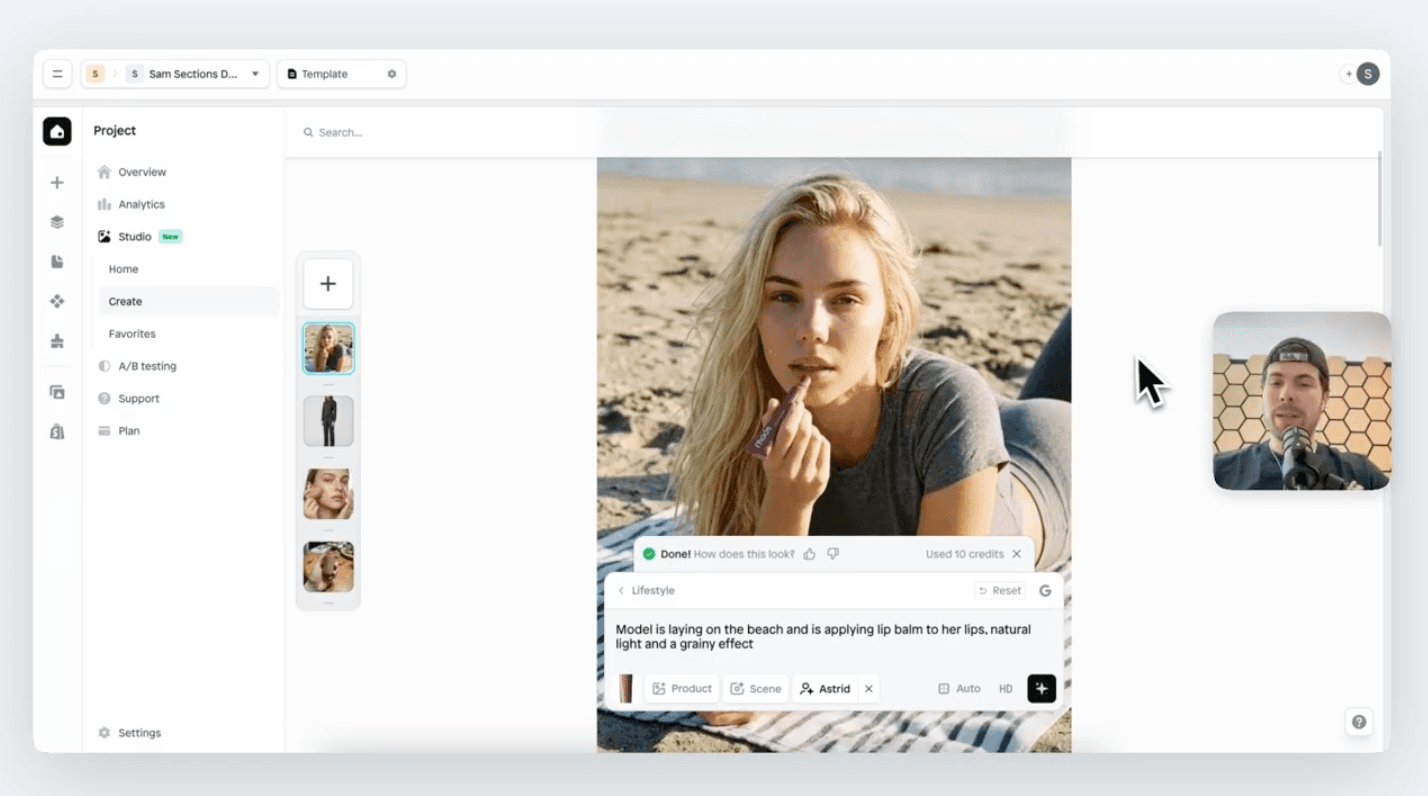
11. Use the AI avatar feature strategically for lifestyle shots
When creating lifestyle images, Instant Studio lets you select an AI model (avatar) to wear or use your product. Pick one avatar and stick with it across your whole shoot, this is how you maintain a consistent, professional look across all your lifestyle images.
Then use your prompt to direct the scene around them.
Try prompts like:
"She's walking confidently down a sunlit street, wearing the hat tilted slightly to one side, dressed in a neutral beige trench coat."
"The model is sitting at an outdoor café table, holding the bag naturally in her lap, relaxed and smiling slightly."
"Candid-style shot, the model looking off to the side, mid-laugh, wearing the jacket over a white t-shirt."
Here is a tutorial sharing how to create lifestyle images with models with Instant Studio:
12. Treat it as a conversation, not a one-shot attempt
The best results rarely come from the first generation. Instant Studio is designed for iteration, so generate, review, adjust a setting, or tweak a word in your prompt, and generate again. Small changes can produce surprisingly different outputs.
Think of it less like placing an order and more like working with a creative collaborator who needs a bit of back-and-forth to fully understand your vision. The more you experiment, the more you'll develop an intuition for what prompt and settings combinations work best for your products.
Great AI images start with clear direction
No matter which AI image generator you use for your AI product photography, the same rule applies:
Clear input creates better output. Strong AI image prompts are not about stuffing in more words. They’re about clarity and specificity. Intentional control over lighting, angle, mood, color, and composition. The best results happen when you think like a photographer or creative director, not like someone typing search terms into Google.
What makes Instant Studio especially powerful is that it removes much of the guesswork. Instead of forcing you to control everything in one long prompt, it gives you structured tools: presets, lighting controls, angles, AI model selection, and resolution settings, so your written prompt can focus on creative refinement rather than technical setup.
That’s the difference between random generation and intentional image creation.


