Adding Shopify custom sections to your store for enhanced functionality
Instant Team
Adding Shopify custom sections to your store for enhanced functionality
When it comes to Shopify conversion rate optimization store design matters, try to put yourself in the shoes of your online store visitors. You land on a page, and right away, it feels off. Perhaps the layout looks outdated, or the sections are cluttered with information that doesn’t seem to relate to one another. Before you know it, you’re clicking the back button and looking for a different store to buy from. This is the reality of not having a well-structured Shopify store. Custom sections are essential to building a great-looking online store that boosts Shopify conversion rates. In this article, we’ll explore Shopify custom sections in-depth so you can create them like a pro.
Instant’s solution, Shopify landing page builder, is a valuable tool for achieving objectives such as finding resources or tools for creating custom sections for Shopify themes. With our user-friendly app, you can easily create custom sections for your Shopify theme to help you better structure your online store and improve your conversion rates.
Table of Contents
What's the difference between online Store 2.0 themes and vintage Shopify themes?
Four possible ways of adding custom sections to your Shopify theme
How do I add custom sections to Shopify? Add custom sections in Shopify without coding
What are Shopify custom sections?

Shopify custom sections are a powerful feature that lets you create personalized, dynamic areas on your Shopify store without needing to code. Think of them as flexible building blocks that make it easy to design unique parts of your store pages, such as custom banners, product showcases, testimonials, or any other content you want to highlight.
What's great about custom sections is that they give you control over your store's layout and content, allowing you to adjust and update them directly through Shopify's drag-and-drop editor. This flexibility means you can tailor your store's look to fit your brand better, add special promotions, or test different designs to see what works best.
How do Shopify custom sections work?
For example, if you want a homepage featuring your best-selling products or special holiday promotion, you can create that section, customize how it looks and behaves, and drop it wherever you want. No need to rely on a static theme or hire a developer for every change. Custom sections make it accessible for you to create something unique.
Shopify custom sections offer a user-friendly way to personalize your store without requiring extensive technical know-how. They also enhance your store’s overall flexibility and design appeal.
Related Reading
Why use custom sections on your store

Adding custom sections to your Shopify store gives you more design flexibility to make your store fit your unique vision. With Shopify custom sections, you can create unique layouts for your online store to stand out. You can easily update and change these sections to keep your store looking fresh.
Custom sections improve store design flexibility
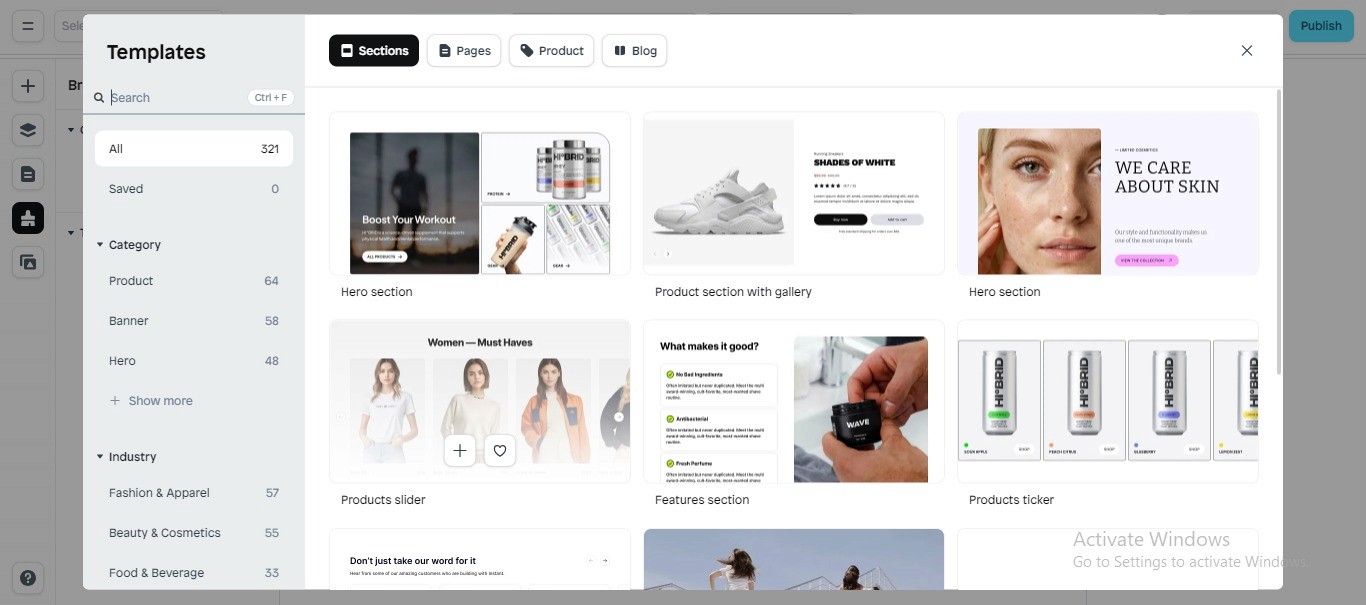
One of the most significant advantages of adding custom sections to your Shopify store is the ability to customize your site without technical expertise. Shopify's drag-and-drop editor and other page builders like Instant make it easy to create unique layouts and update content in real time.
This means you don’t need to hire a developer for every little change you want. Want to create a custom holiday banner or highlight your latest product collection on your homepage? With custom sections, you can do that quickly and make your store stand out from competitors.
Custom sections help personalize the shopping experience
Custom sections allow you to craft a more personalized shopping experience. You can build sections that:
Directly cater to your audience’s preferences
Showcasing customer reviews
Adding a featured product slider
Creating a section for special promotions
The more tailored your store feels, the more engaged your customers will be, leading to better user experiences and, hopefully, more sales.
Custom sections offer flexibility for promotions and sales
Are you running a flash sale or introducing a new product line? Custom sections allow you to create dedicated spaces on your site for these events without overhauling your entire design. You can quickly add:
Promotional banners
Countdown timers
Limited-time offers
That catches your customer's attention and then just as easily removes or updates them once the promotion ends.
Custom sections improve your store’s functionality
Custom sections aren't just about design; they can enhance your site's functionality. You can integrate features like:
Product filtering
Quick view options
FAQ sections
Giving your customers the tools they need to shop more efficiently. By strategically placing these sections, you can help guide customers through the buying process and increase your store's overall usability.
Keep your Shopify store fresh with custom sections
With the ability to easily update your custom sections, you can keep your store looking fresh without constantly redesigning it. Whether adding seasonal touches, highlighting new products, or simply keeping the layout dynamic, custom sections allow you to maintain a store that feels alive and engaging, which helps build customer loyalty over time.
Enhancing Shopify store performance with customizable landing pages
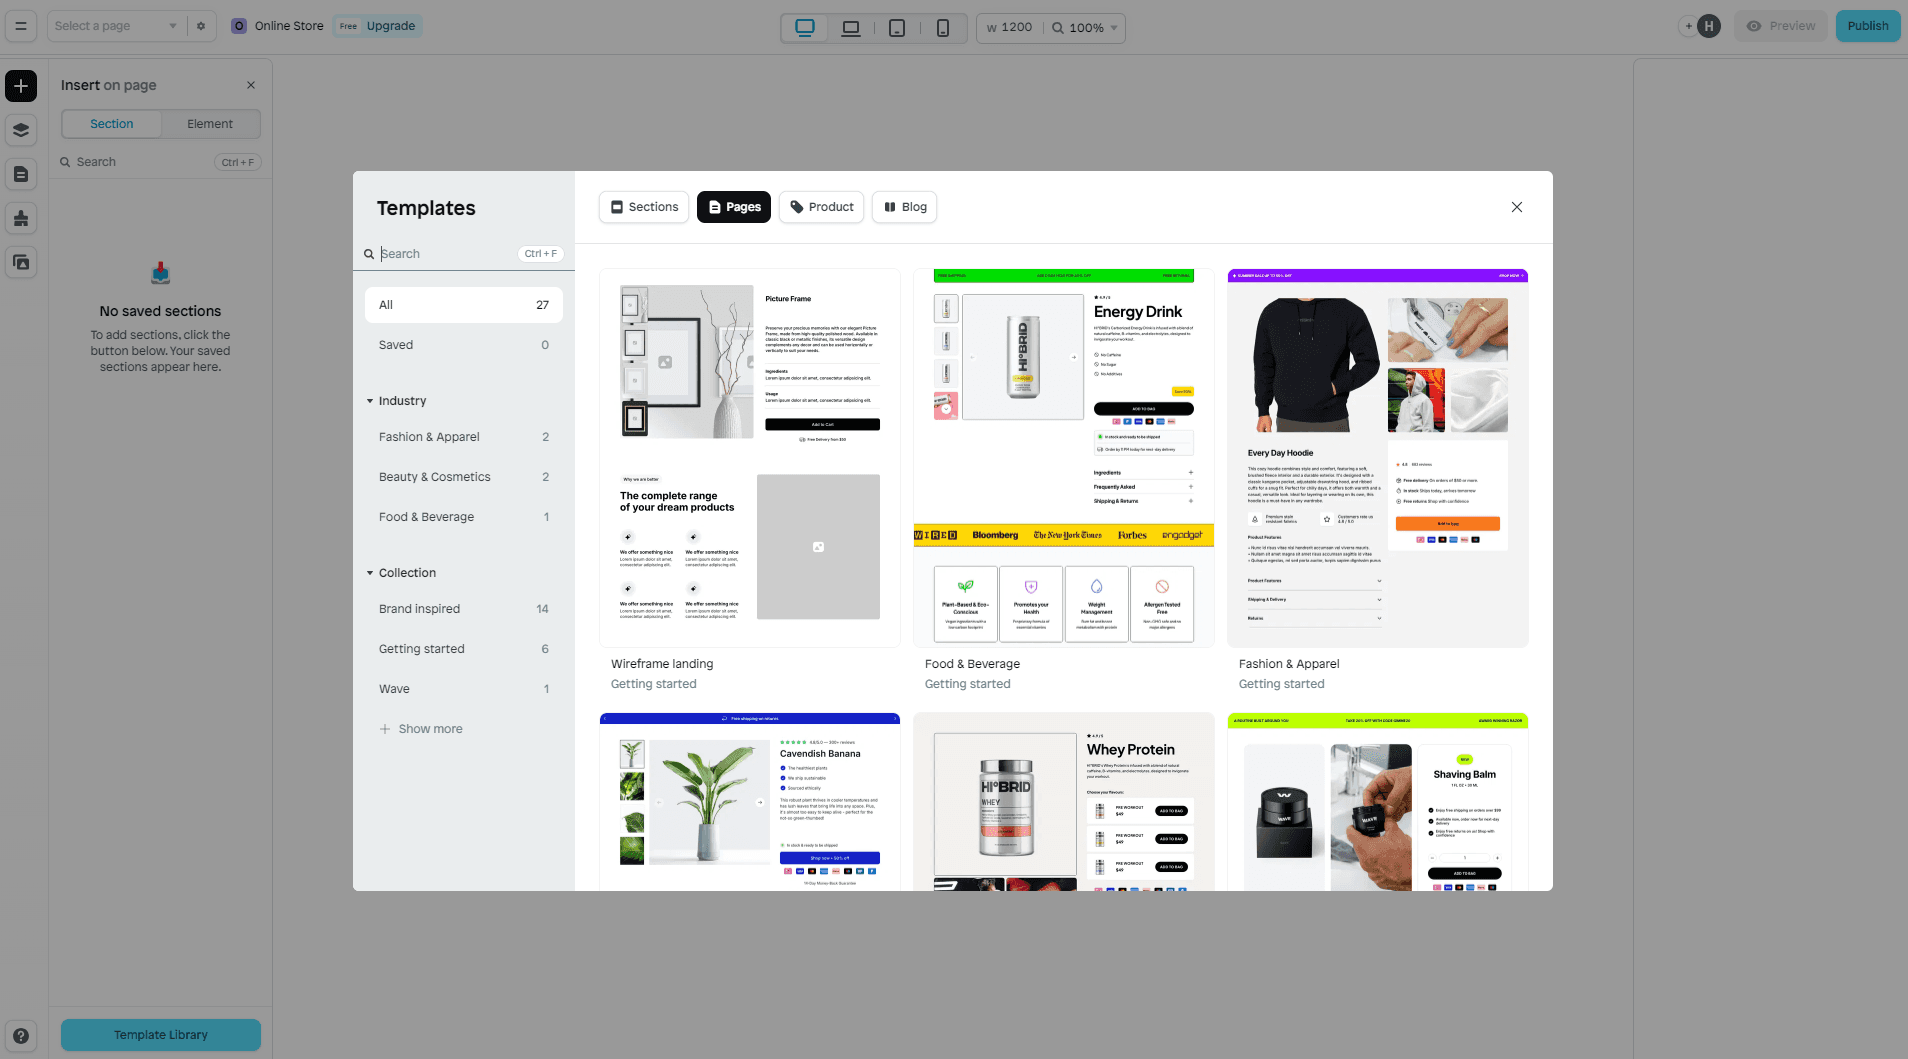
Instant is a user-friendly Shopify landing page builder that allows eCommerce teams and agencies to create fully customizable and advanced pages without any coding knowledge. With its intuitive drag-and-drop interface, users can quickly design and publish:
High-converting landing pages
Product detail pages
Sections
Instant also offers seamless integration with Figma and other eCommerce tools, making it a versatile choice for enhancing online store performance and increasing conversions.
Try Instant's Shopify landing page builder today!
What's the difference between online Store 2.0 themes and vintage Shopify themes?

Customizing Shopify themes: The difference between OS 2.0 and vintage themes
There’s no getting around the importance of Shopify themes when designing your online store. A Shopify theme dictates how your store looks and performs and can seriously impact your conversion rates. Vintage Shopify themes like:
Debut
Simple
Brooklyn
They are no longer available in the Shopify theme store. The new default theme is Dawn, an Online Store 2.0 theme, and it’s one of the most flexible and powerful Shopify themes available. Vintage themes are still functional but outdated and severely lack the features and flexibility of OS 2.0 themes. If you want to future-proof your store and make the most of your Shopify store, it’s time to upgrade to an OS 2.0 theme.
More flexibility with sections on every page
One of the most significant advantages of OS 2.0 themes is the ability to add sections to every page, not just the homepage. Previously, vintage themes like Debut limited sections to specific areas, meaning customization options were far more rigid. You can mix and match sections on any site page with OS 2.0 themes, like the new default Dawn theme.
This unlocks a new level of flexibility for customizing product pages, landing pages, and more without diving into the code. Vintage themes don't support this functionality because of their older theme architecture, so they won't get these new features even though they’re still updated for security.
New theme architecture: JSON vs. Liquid
Another key difference is in the architecture of these themes. Vintage Shopify themes, like Simple, rely heavily on Liquid files in the templates folder to manage how pages are laid out. For example, the product page in a vintage theme might only reference a couple of section files to determine the structure. All the logic for how the page functions is tied up in one section file. This makes editing or customizing layouts much more complex for non-developers.
In contrast, OS 2.0 themes use a more modern JSON-based template system. These JSON files reference various blocks, which are smaller page components, allowing for a more modular and flexible design. You can easily reorder or modify these blocks using Shopify’s drag-and-drop editor, and changes made in the theme editor automatically update the JSON files. This modularity is what makes OS 2.0 themes so much more user-friendly.
Vintage themes are phasing out
Vintage themes, like Debut, are no longer available in the Shopify Theme Store, and while they may still get occasional updates, they’re on the way out. Free vintage themes, in particular, won’t get future security updates, further encouraging store owners to switch to OS 2.0. If you're still using a vintage theme, it’s worth considering upgrading to take advantage of the added flexibility and future-proof your store.
Better performance and future-proofing with OS 2.0
With OS 2.0 themes, Shopify has laid the foundation for future innovations. Not only do they offer greater design flexibility, but their structure also leads to better performance and ease of use.
As Shopify continues evolving, OS 2.0 themes are built to accommodate future updates and new features, ensuring your store remains competitive and up-to-date. Vintage themes, on the other hand, are gradually becoming outdated and will only support some of these advancements.
How to navigate & use Shopify custom sections and blocks

Add and remove custom sections and blocks
Adding new sections and blocks in Shopify is easy. Simply click Add section (or Add block) to customize your pages quickly. New sections start at the bottom of the page, but you can move them anywhere you like. Removing sections and blocks is even easier. Just click the section or block you want to remove, then click the Remove button that appears.
Move custom sections or blocks up or down the page
Once you add a custom section or block, you’ll likely want to move it out of the bottom position. To do this, hover over the section or block in question, click and hold the six-dot icon, and drag it wherever you want.
Customize Shopify custom sections and blocks for your needs
When everything is in its right place, you’ll want to customize the sections and blocks to fit your vision of the page best. Click on the section or block, and the customization menu will appear along the screen's right side.
Each section and block has its customization options determined by the theme. You can change things like:
Heading text
Image displays
Alignment
Colors
Padding
Margins and more
Four possible ways of adding custom sections to your Shopify theme

1. Hiring a developer: The custom Shopify sections dream come true
Hiring a developer is the traditional way to add custom sections to your Shopify store. The big advantage? You get exactly what you want, tailored to your store's needs. A skilled developer can create sections that are not only visually appealing but also well-optimized for performance, ensuring your store runs smoothly.
The downside? It’s expensive! Depending on complexity, a good developer can cost anywhere between $200 to $1,000 for a typical custom section. Hiring cheaper developers might save you some cash upfront, but it could lead to issues like:
Slower loading speeds
Poor usability
Possible bugs
Just like you wouldn’t want a cheap surgeon, you don’t want to compromise on the quality of your store’s code. Platforms like Toptal and Storetasker are good options for hiring high-quality developers. Toptal is known for its strict screening process, which accepts only the top 3% of developers and is ideal for more complex, long-term projects. If you need smaller tasks done, Storetasker is a solid option for affordable, reliable freelance developers specializing in quick 1-3 hour jobs.
2. Page builder apps for custom sections: Flexible Shopify sections for everyone
Page builders have revolutionized how people design Shopify stores, especially for those who don’t know how to code. With the drag-and-drop functionality, you can create entire pages or specific sections without touching the code editor. Some page builders allow you to create custom sections that can be used anywhere on your store, just like native Shopify sections.
For example, Instant is a page builder specializing in creating these custom Shopify sections, which can be edited directly in Shopify’s theme editor for a seamless design experience. Not all page builders support custom sections. For example, Gempages is a popular builder focusing only on full pages, not individual sections. If you’re looking for flexibility and ease of use, these tools can be game changers, allowing you to design landing pages, product showcases, and more without needing to code.
3. Pre-built code snippets from creators: Affordable custom sections for Shopify
Buying pre-built code snippets for custom sections is a cost-effective, high-quality solution, especially for smaller stores. Independent creators and companies like Luna Templates, Ecom Graduates, and Qwiqode sell ready-made sections you can copy and paste into your theme. These sections become part of your theme’s architecture, meaning they won’t slow down your store and can be managed directly through Shopify’s theme editor, just like any built-in section.
The great thing about this method is that it’s affordable, typically around $20 to $30 per section. The downside? Support can be limited. Since you’re purchasing from independent creators, you may not have access to ongoing technical assistance, and you’ll need to reinstall the section each time you update your theme. It’s not a huge hassle, but something to keep in mind.
4. Apps for specific sections: The traditional Shopify custom sections approach
Apps are the classic way to add functionality to your Shopify store. Need a trust badge section? There’s an app for that! But the catch is that you often install multiple apps for various features, each with its monthly fee.
While this method works, it’s not the most efficient. You may find yourself with 20+ apps, each costing around $10 a month, and your store could start to slow down due to the sheer number of apps running in the background. This approach can get messy from both a financial and technical perspective, and it’s why many store owners prefer custom-built sections or a single, more comprehensive solution.
Related Reading
How do I add custom sections to Shopify?

Adding custom sections to Shopify is easy when you know how to do it. In short, if you have a custom-coded section for your Shopify theme, adding it using Shopify’s code editor is fairly straightforward.
This task is best handled by developers familiar with Liquid (Shopify’s templating language), as coding errors can easily disrupt your theme’s functionality. Here's a step-by-step guide:
Navigate to the sections folder in the code editor
Go to your Shopify admin panel and click Online Store and then Themes. Select Actions next to your current theme and click Edit code. In the code editor, scroll down and locate the Sections folder. Click Add a new section to create a new section file.
Name your new section
Follow naming conventions to make your section easily recognizable. If you're creating a banner section, include a banner in the name, like a custom banner. Shopify will automatically add the .liquid file extension. Click the Create section to generate the file.
Add your custom liquid code
The new section file will include a basic template. You’ll see a placeholder for your section’s code, which includes:
Section schema: This defines your custom section's settings and content blocks, enabling you to control its appearance and functionality via Shopify’s theme editor.
CSS styles: You can add or link custom styles that apply to this section.
JavaScript (if needed): If your section includes interactive elements, you can add or reference custom JavaScript.
Paste or write your custom Liquid code into this section.
Add your custom section to page templates
After saving the new section, it should be available in your Shopify theme editor, assuming you included the proper presets in your section’s schema. You can either:
Limit its use to specific page templates.
Make it available globally across all page templates.
Navigate to the theme editor, where your custom section will be ready to drag and drop into the page layout.
Custom-coded sections in Shopify
While adding custom sections via the code editor is simple, the challenge is writing and structuring the Liquid code properly. This requires a good understanding of Shopify’s architecture, which is why most merchants rely on experienced developers for this task.
Errors in the schema or missing assets (like CSS or JavaScript) can cause formatting issues or prevent the section from displaying correctly. That said, custom-coded sections allow you to integrate unique design and functionality into your Shopify store, giving you the flexibility to tailor your store’s appearance and performance to your brand's needs.
Related reading:
How do I add custom sections to Shopify? Add custom sections in Shopify without coding

Page builders' sections for Shopify allow merchants to create custom sections that can be used in the Shopify theme editor like any other native theme section.
Creating a new section for any current page builder users will look nearly the same as building a new page. Step-by-step guide to adding custom sections using Instant:
1. Install Instant
You need to install the Instant app from the Shopify App Store. This app provides a user-friendly interface for building custom sections.
2. Access the Instant dashboard
Once installed, navigate to the Instant dashboard from your Shopify admin panel. This is where you’ll create and manage your custom sections.
3. Create a new section
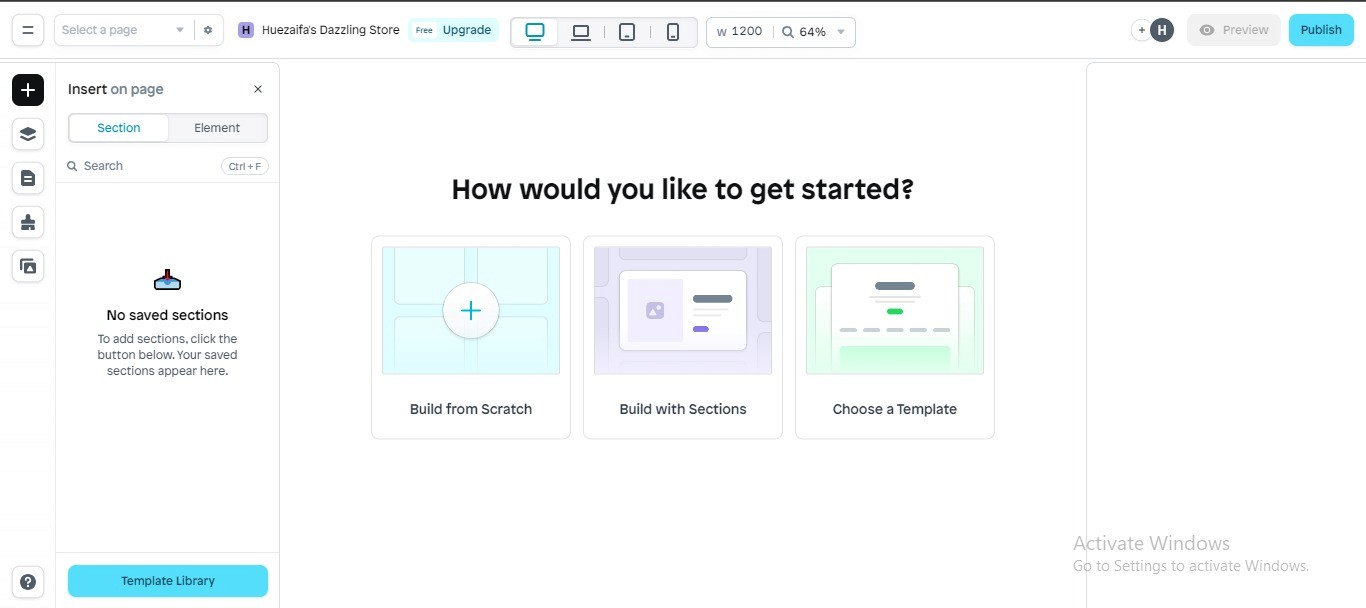
In the Instant dashboard, look for an option to create a new section. Click on it to start building your custom section.
4. Use the drag-and-drop editor
Instant features a drag-and-drop editor that allows you to easily add and arrange elements within your section. You can include various components such as images, text blocks, buttons, and more.
5. Customize your section
As you build your section, you can customize it to fit your brand. Adjust settings like colors, fonts, and layouts to ensure the section aligns with your overall store design.
6. Save your section
After you’ve finished designing your custom section, save your changes. Instant will convert the section into native Shopify Liquid code, making it compatible with your Shopify theme.
7. Add the custom section to your store
Go to your Shopify theme editor. Select the page where you want to add the new section. Click on Add Section to see your custom section listed there. Select it to add it to the page layout.
8. Edit in the Shopify theme editor
You can further edit the section directly in the Shopify theme editor. This allows you to make adjustments or updates as needed without going back to the Instant app.
9. Publish your changes
Once you’re satisfied with how everything looks, make sure to publish your changes. Your new custom section will now be live on your Shopify store.
Related Reading
Optimize your Shopify store for conversions without breaking the bank with Instant's Shopify landing page builder
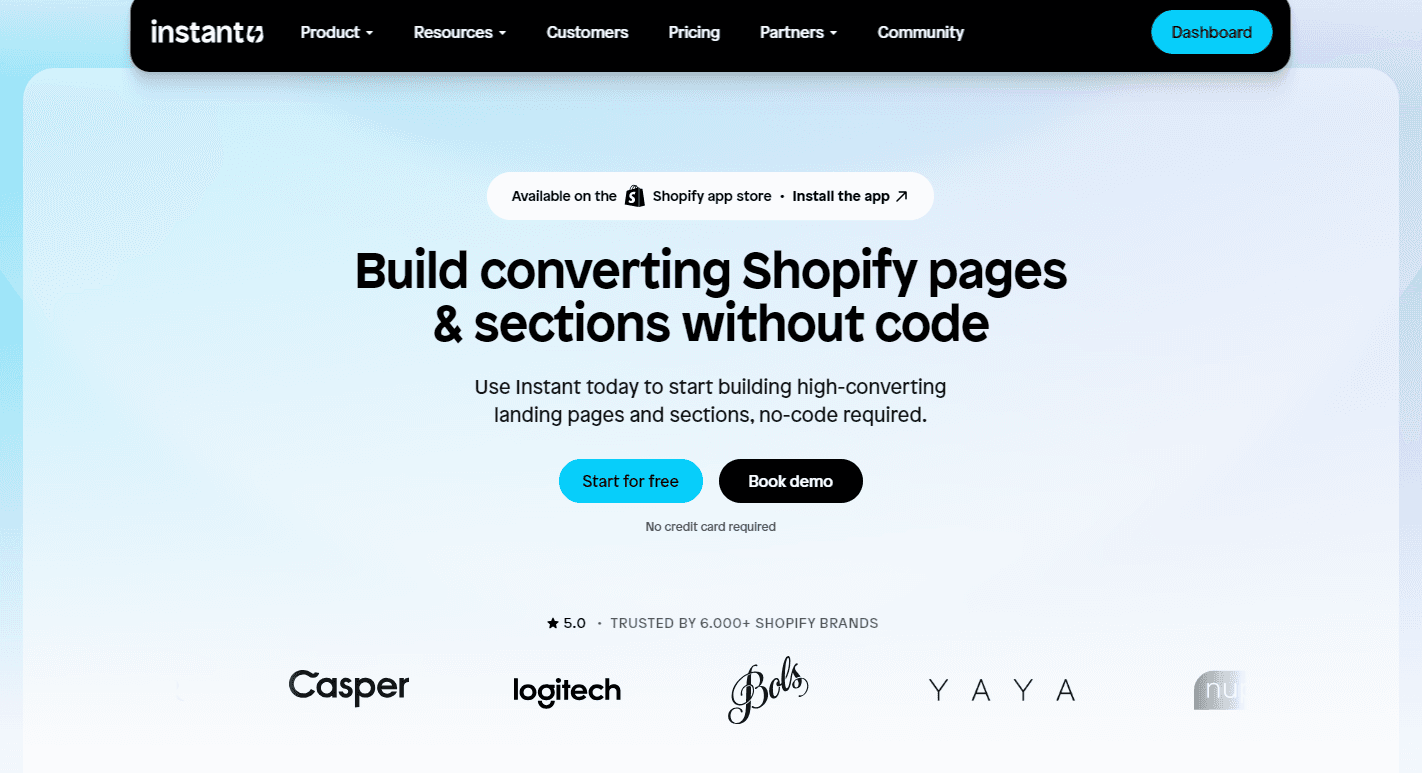
Instant is a user-friendly Shopify landing page builder that allows eCommerce teams and agencies to create fully customizable and advanced pages without any coding knowledge. With its intuitive drag-and-drop interface, users can quickly design and publish:
High-converting landing pages
Product detail pages
Sections
Instant also offers seamless integration with Figma and other eCommerce tools, making it a versatile choice for enhancing online store performance and increasing conversions.
Try Instant's Shopify landing page builder today!
More stories
eCommerce
·
Feb 17, 2026
Shopify
·
Feb 6, 2026
Shopify
·
Feb 6, 2026


